By Holly Sosa
Editor’s Note: Today marks the first post in an organization series and collaboration I’ve put together with several bloggers I know and admire. In the coming weeks, each Wednesday, we will share an organization project with you along with our tips, tricks, and ideas. And of course those before and after photos we all just love to analyze. Welcome to Destination Organization: a collaboration of organization projects to inspire you to tackle your clutter at home.
Hi everyone! My name is Summer and I blog over at Crosbie Crew. Over there I like to share about being a mom to 3 boys and our adventures, fun activities to do with your kids, a few recipes and my photography.
Today I’m going to share 5 easy tips when it comes to organizing your kitchen pantry. When I started this organization process, my pantry was a nightmare! Having three young boys, they don’t always put back items where they belong and my one year old likes to throw stuff off of the shelves just for fun.
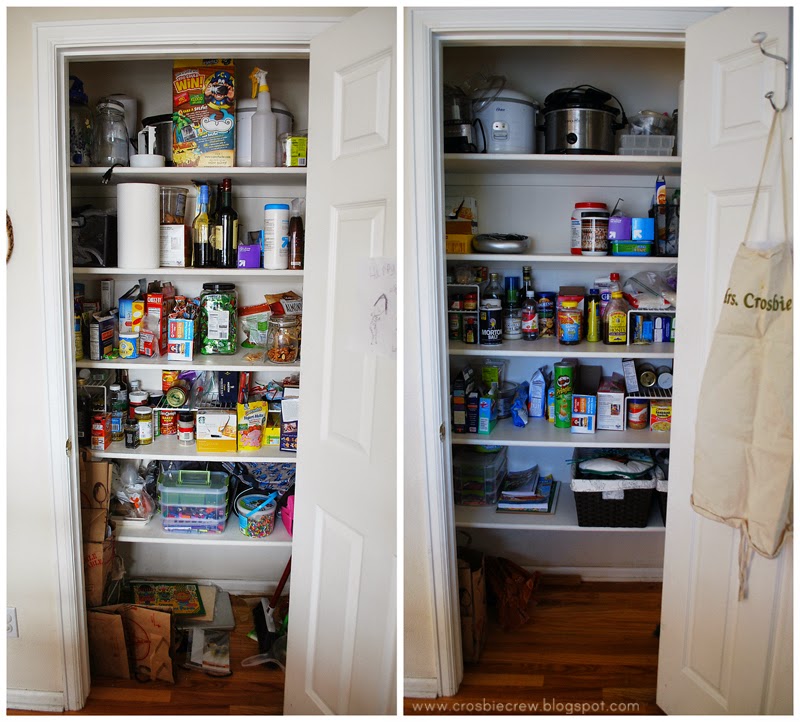
So here is my before and after. Embarrassing!
Let’s get this process started!
Step 1:
Take everything out! I know it might sound a bit daunting to take everything out but it’s necessary. You can wipe down the shelves and have a blank slate. Once you start putting food and other items back in, you can take stock of what you need to make your grocery shopping faster and help you find things quicker!
Step 2:
It’s time to get rid of stuff and organize! Go through all your food and get rid of anything that has expired. You can also go through your appliances and see if you really need it. My general rule is, if we haven’t used it in a year, it’s time to go.
To save some money, I searched around my house for different bins I had that weren’t being used and found a couple. I had three bins and this is how I used them.
-One I used for all my cleaning products. Now I can just pull it out and take it to any room I might be cleaning.

-Another I used for all my loose party supplies like napkins, paper plates, plastic cups and straws. These things were always in the way or falling off of the shelf. Not anymore!
-The last one I used was for all our lunch bags and random reusable bags that also slipped off shelves or just took up too much space.
Step 3:
Decide where everything will go!
-Glass and appliances that aren’t used everyday should go on the top shelf. This way your glass is kept safe and you have better access for the stuff you will need on the lower shelves.
-Your cleaning products should be kept out of reach of little hands so keep them on a higher shelf.
-Alcohol should also be kept on a higher shelf.
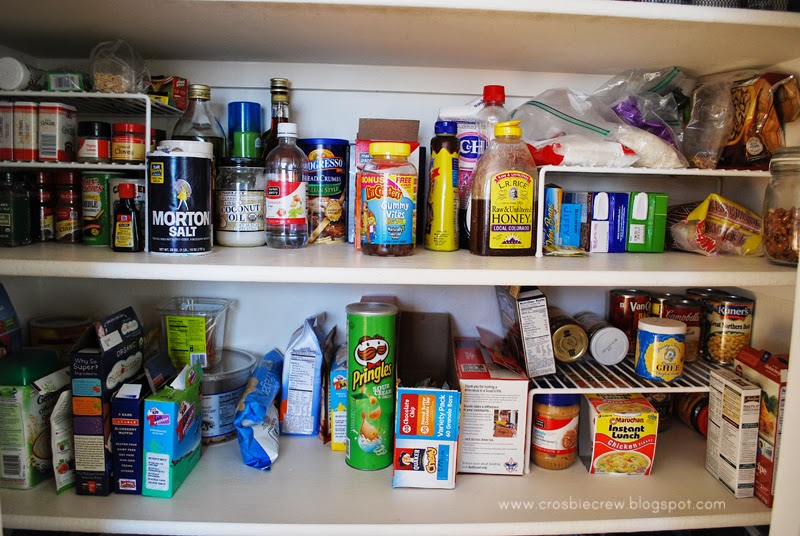
-Food you use everyday should be kept at waist level and be easily seen. You can divide a couple shelves anyway you like. One I made the cooking/baking supply shelf and the other is a breakfast/snack and dinner supply shelf.
-My bottom shelf holds things like my little pink tool kit, items for the boys and two bins.
Step 4:
Let’s put everything back! If you want to buy some shelf organizers, go ahead but they aren’t really necessary. Try to put like items next to each other and labels facing out. Once your pantry is organized, you can find things fast which is so helpful.
Step 5:
Keep it clean! I know this is easier said than done. Try to go through your pantry every couple of weeks to make sure everything is fresh and where it needs to be. You can even get your kids involved and have your older ones help organize their snacks.
I hope these tips help you the next time you decide to organize your pantry! Thank you so much Holly for having me here today!
Be sure to head over and follow Summer’s blog, Crosbie Crew. You can also find her on Instagram, Twitter, and Pinterest.
The post Organize Your Pantry with Summer of Crosbie Crew! appeared first on Our Holly Days.